如何选择苹果照片?
(如何选择苹果照片?删除照片)
晚上好,艾瑞巴蒂,我是你可爱的小助理皮卡秋!

上周的iPhone大家都看过原生滤镜吗?《iPhone原滤镜也太多了!好!用!了!吧!》
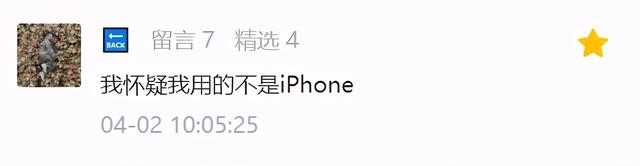
小助理看到后台朋友的留言,怀疑自己用的是假的iPhone?!哈哈哈,看来真的有很多不知道的小功能可以和大家分享。~
今天,我们将继续唠叨iPhone自带相册等小功能!也很实用,看看你今天能学到多少新技能?

(苹果赚钱!)
Part1.涂鸦标记功能
1.放大镜
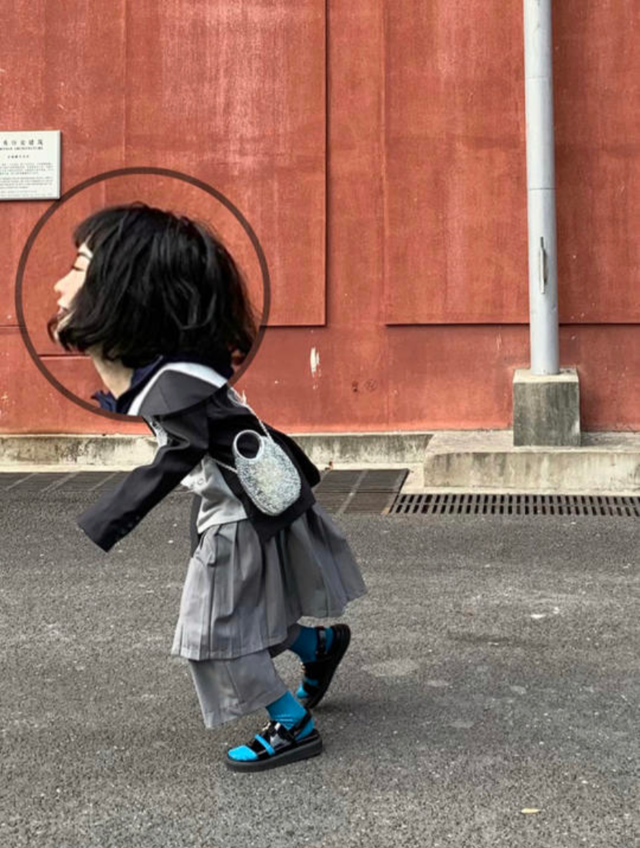
最近小红书特别火的放大镜大头照不知道大家有没有刷过,真的超级可爱!

|Photo by 小红薯 @一口沙拉酱
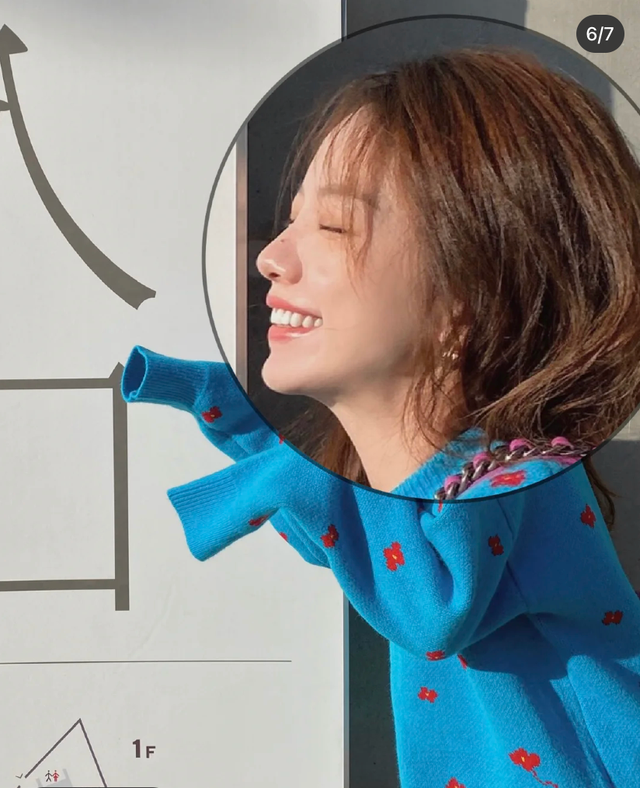
|Photo by 小红薯 @满满cyim
|Photo by 小红薯 @满满cyim
漫画里的很多人物都是这样的大头哈哈哈,可爱可爱,难怪这么火~

比如柯南君不会长大的柯南君
hahaha话说回来,放大镜其实就是iPhone相册上的功能!来看看这么可爱的特效是怎么做出来的。~

第一步:
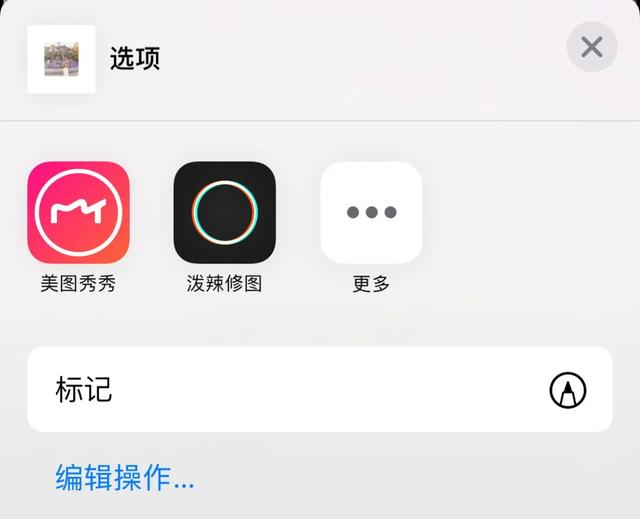
打开照片后,点击右上角的编辑按钮,然后点击右上角的编辑按钮

,注意下面弹出的工具栏。
第二步:
点击标记功能键,最后点击右下角的加号,看到放大器的小工具~
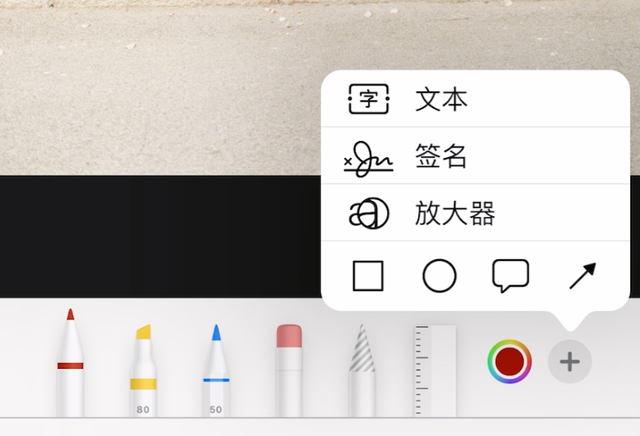
你可以把放大器放在任何你想放大的地方。放大器上有很多蓝色和绿色的点。

让我们先来看看圆圈。蓝色小点点,按住它,然后拖动到两边或中间,以实现放大区域的大小。

让我们先来看看圆圈。蓝色小点点,按住它,然后拖动到两边或中间,以实现放大区域的大小。

 绿色的小点调整放大倍数,按住向右滑动放大,向左缩小。
如果你学会了,你可以做很多(gao)趣(xiao)图,给你的蓝朋友,闺蜜安排!
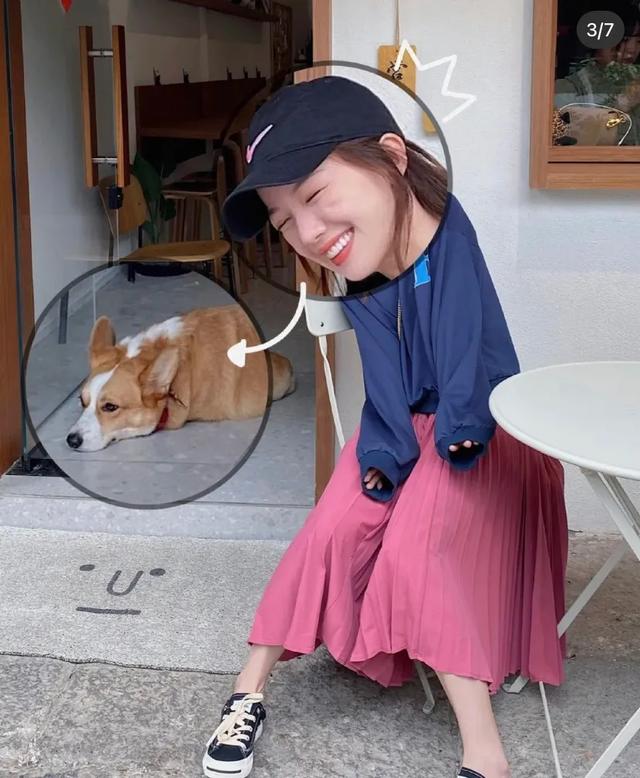
 |
|Photo by 小红薯 @一井豚
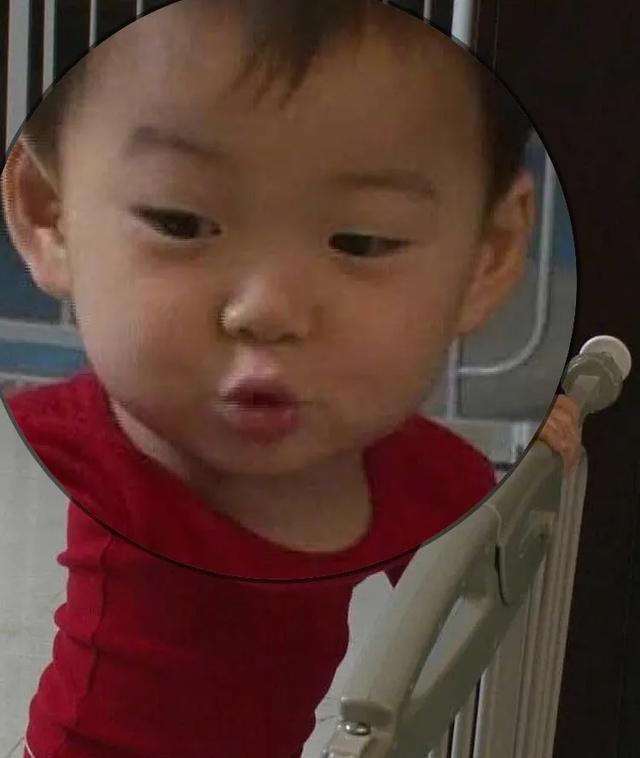
 我jio这个特效简直就是为孩子量身定做的,赶紧给我们民国弟弟一张。
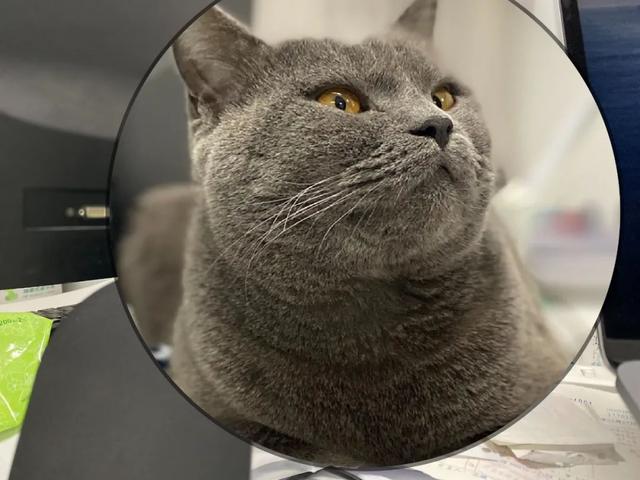 使用放大器小工具实际上是为了充分发挥照片的亮点,所以如果是肖像照片,你必须选择表情敲击可爱的哦,这将会有更好的效果。
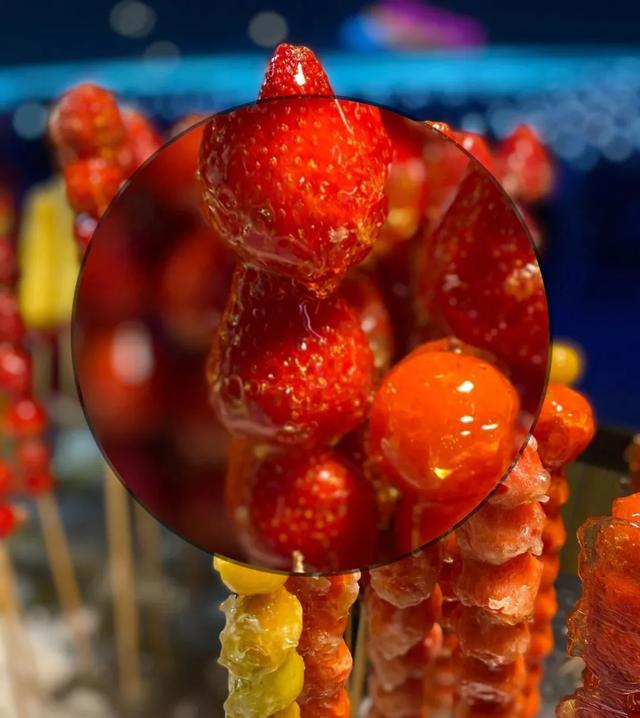
除了肖像,食物和可爱的宠物也是我们创造的好材料?~
 2.画笔
2.画笔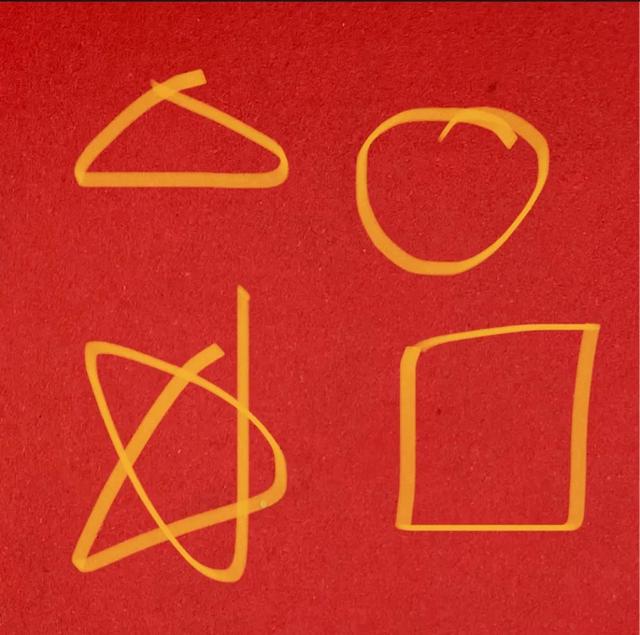 iPhone众所周知,相册的编辑功能中有各种画笔和橡皮擦。我们经常用画笔来标记图片。但是很多人做的标记是这样的
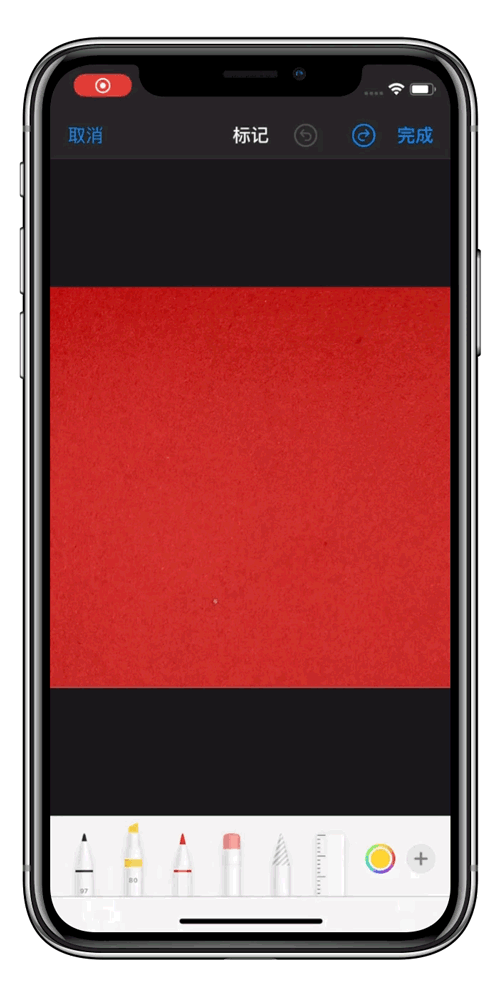
其实iPhone相册的编辑功能中有一个隐藏的小tips!
当我们画笔画圈、矩形、三角形、五角星时,我们只需要画完

我们画歪歪扭扭的形状会形成规则的形状。
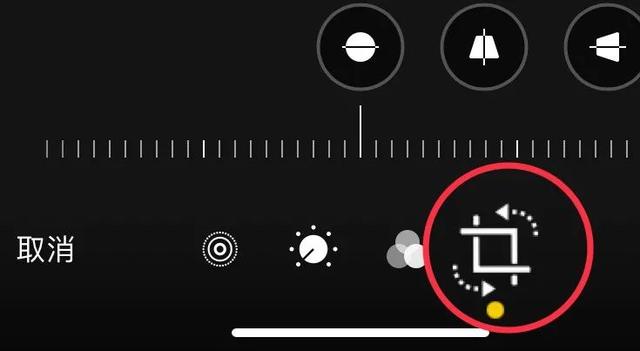
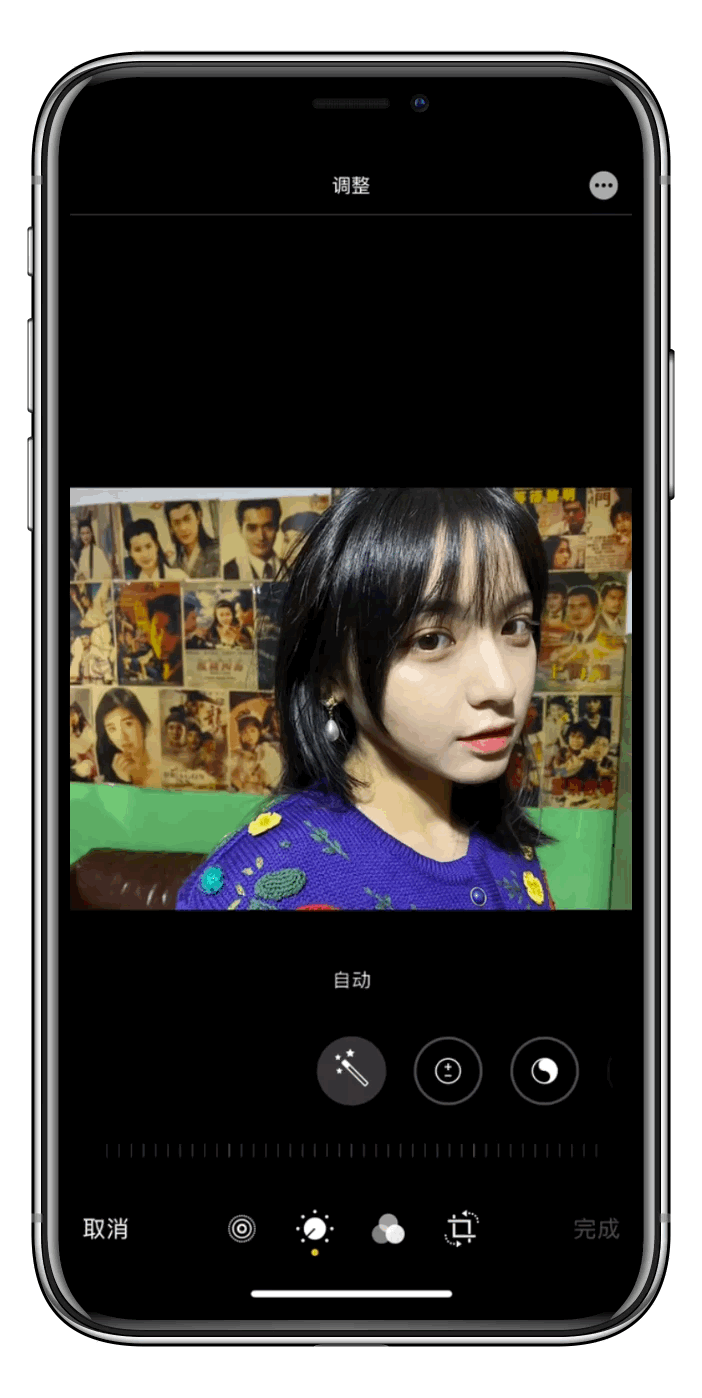
Part2:裁剪功能
 1. 画面校正
裁剪功能中的校正功能通常使用较多。左边的第一个是旋转角度是最常用的!拍斜不用担心,5秒钟就可以校正回来了~
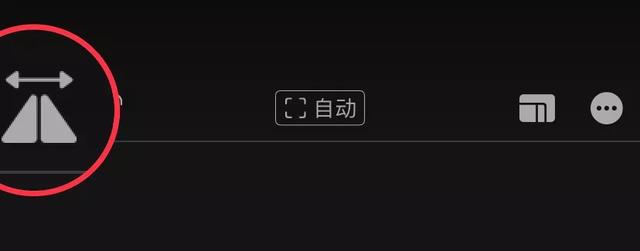
第二个呢,就是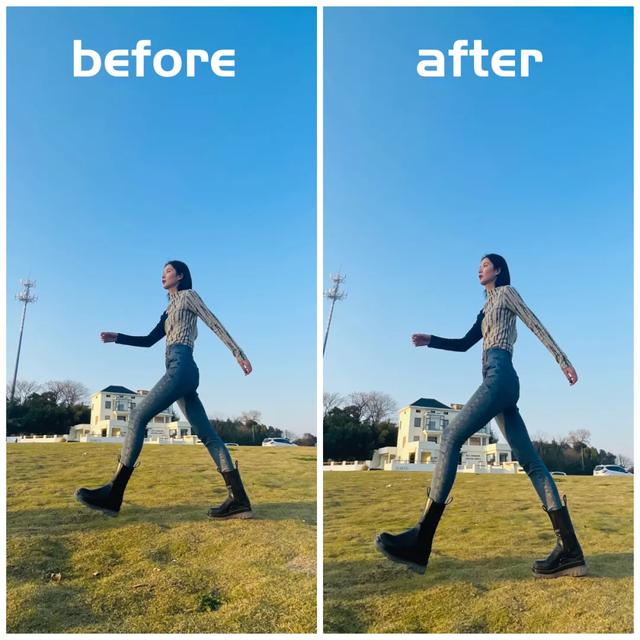
垂直拉伸
,顾名思义,在垂直方向进行拉伸调整,常用于调整一些风景、建筑的畸变透视。
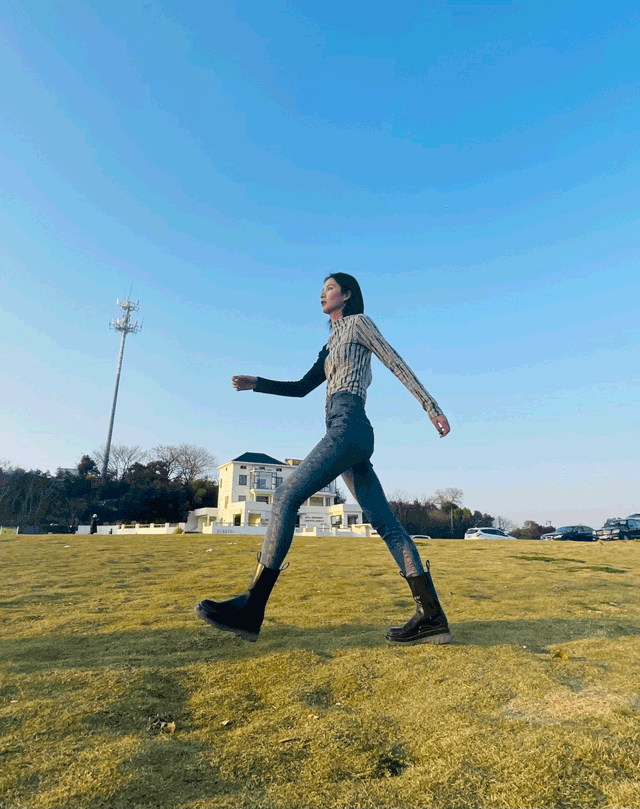
但其实人像也有神奇的用处!最简单的就是可以让你秒变身大长腿,看看这效果!
 第一步:
第一步: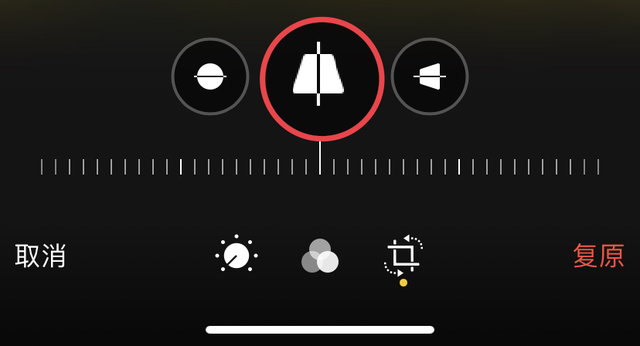 点击编辑、裁剪,然后点击校正中的第二个图标:垂直拉伸~
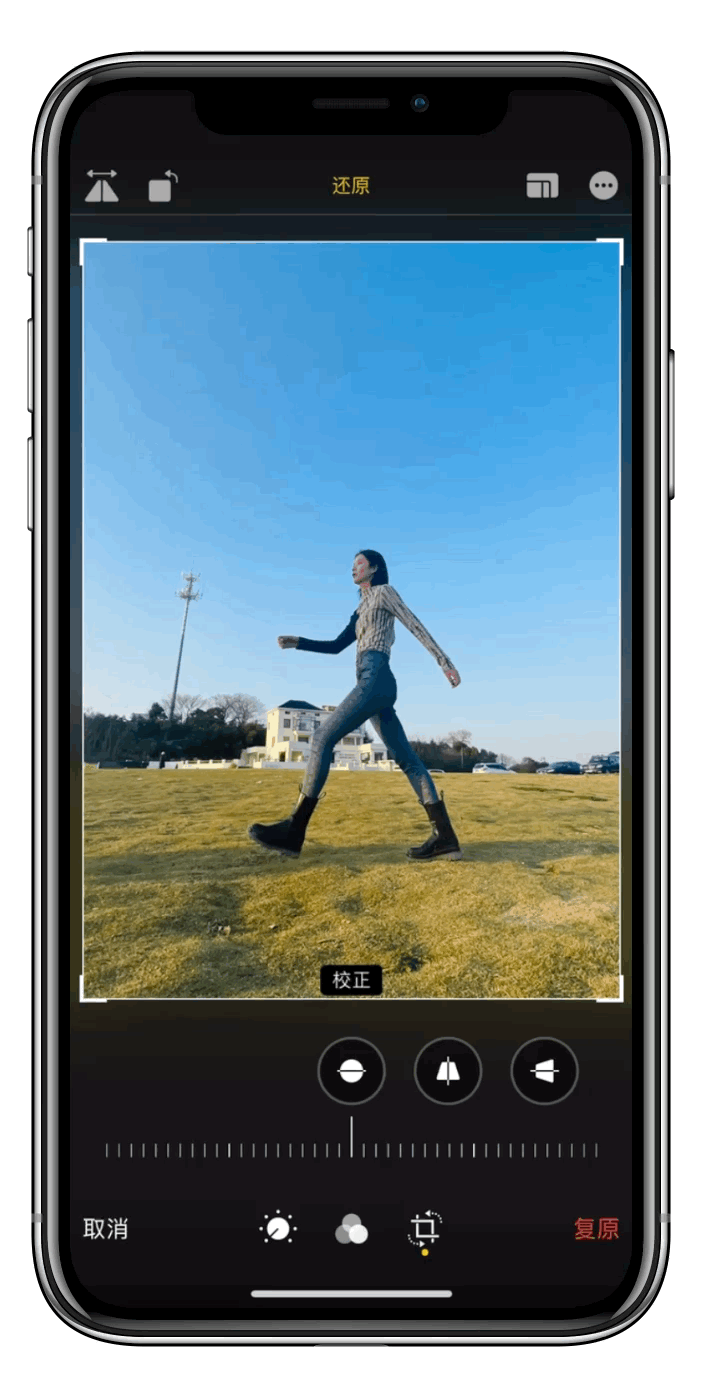 第二步:
第二步:坐标轴
往右拉,画面会垂直向下拉伸,腿会变长!
但要注意!
图片底部距离你的脚底板,需要留出一部分空间!否则,腿会被切掉...
 2.镜像翻转
很多小可爱在用原相机自拍的时候,总觉得很尴尬,不像自己。其实是因为你习惯了镜子里的自己(镜后的自己)~想用原相机自拍,习惯镜子里的自己,可以用到iPhone原相册中的水平翻转镜像比康康镜像前后哪个更好看!

非常方便,不需要跳三方app,两步完成!
非常方便,不需要跳三方app,两步完成!
步骤如下:点击裁剪
选择左上方的水平翻转~

不过吧……一张两张好,多了就有点麻烦了。而且谁不拍几十几百张自拍才会罢休!
其实拍照前可以直接打开自带相机的镜像功能,这样拍出来的自拍都是镜像后面拍的。~

Part3:消除红眼

在光线很暗的环境下,用手机闪光灯拍照,皮肤真的可以!但照片通常有一个问题,那就是红眼睛!
很多朋友可能不知道。事实上,iPhone自带相册有消除红眼的功能!
第一步:
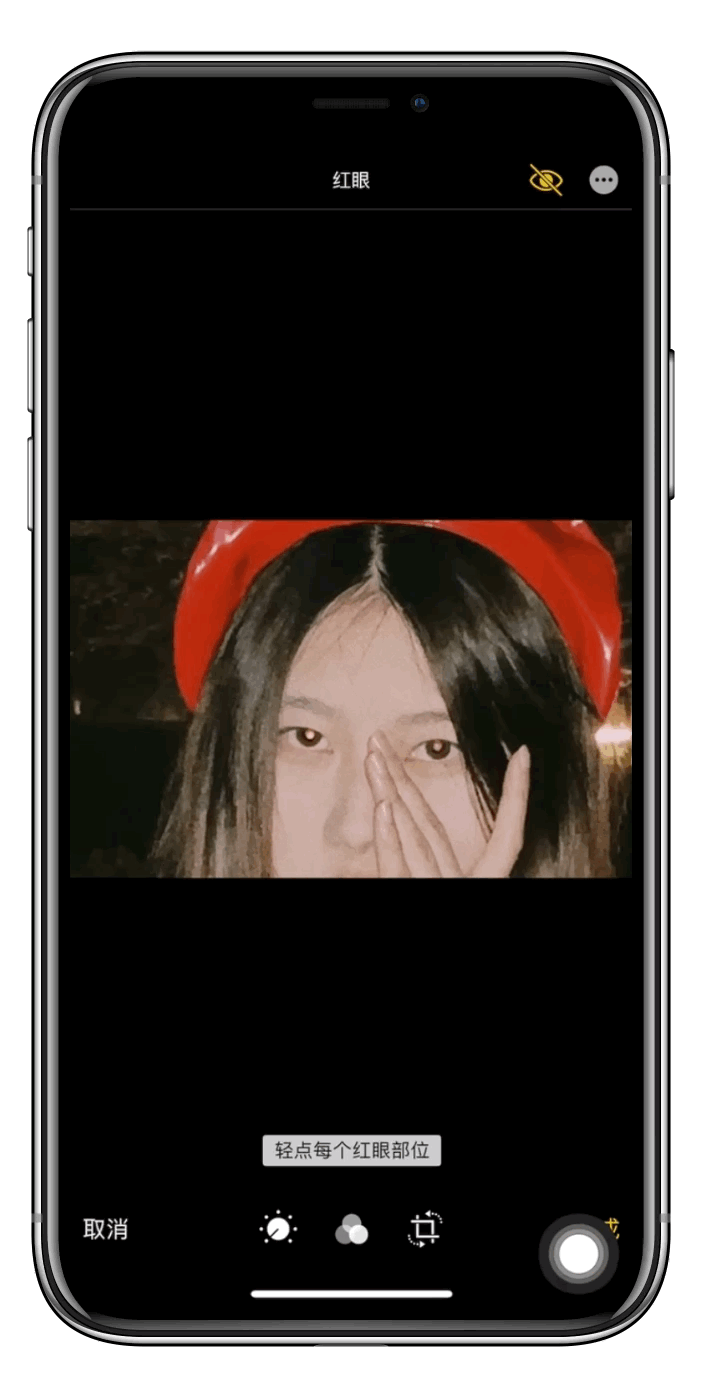 选择闪光红眼的照片,点击右上角的编辑,然后右上角会出现一只小眼睛,如下图所示。
第二步:

点击眼珠的闪光点,红眼会自动消除~
最后说说小bug,当画质不太高时,识别不太准确……但是已经很实用了,赞一下!真的救了我的闪光灯红眼睛~
 事实上,这些非常实用的功能就在我们身边,但我们不知道!接下来,我们可能每周都会分享一期手机自带功能的小技巧。请期待小板凳。~
好了,本期就到这里。如果你觉得今天有收获,请三连支持小助理!小助理的鸡腿靠大家。~
晚安!下次再见~
# 今日话题 #还想学什么修图小技巧?你可以在留言区告诉我们~