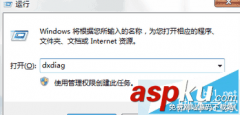
过去的男人能上房揭瓦,现在的男人会装系统。大家好,我是板板,带你装系统,学电脑,解决电脑故障。今日我们来学习在PE下安装 windows10 操作系统(系统启动不了的情况)。
首先,我们需要使用U盘,制作一个PE启动盘。关于启动盘的制作方法,网上已经很多了,这里不在唠叨。我们需要重点了解的是,基本上PE启动盘中都会带一个工具,叫WinNTSetup。其运行界面如下图:
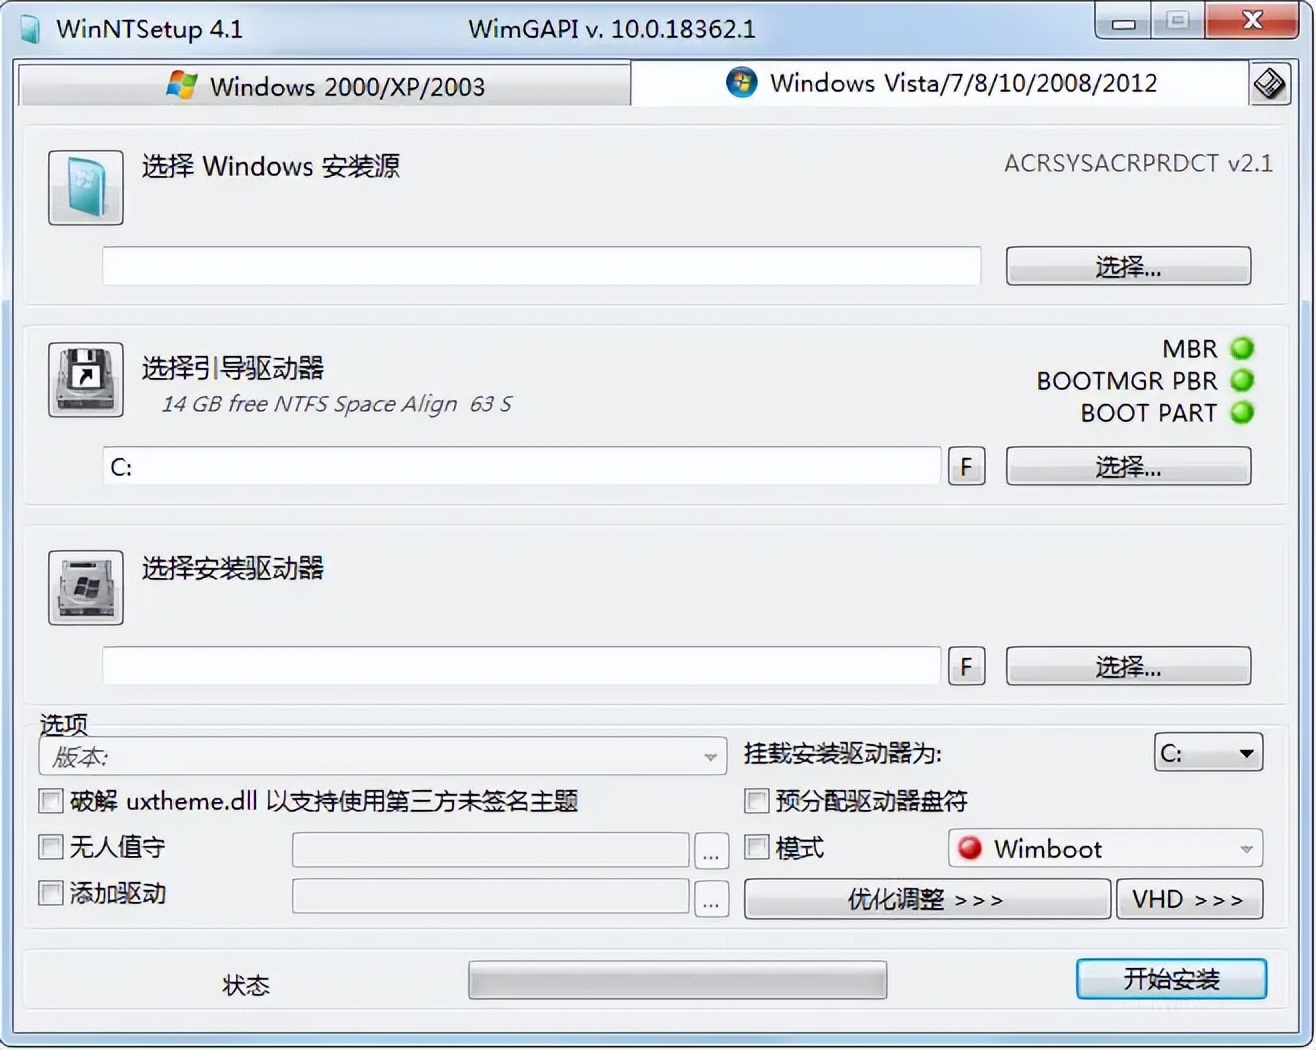
在使用这个工具时,几个主要的地方,及其概念我们需要明白。
选择Windows安装源。支持iso光盘镜像和wim镜像。意思是我们下载windows10的安装镜像iso文件,放到U盘或者硬盘中,在这里选择就可以了。
选择引导驱动器、选择安装驱动器。这里的驱动器,就是我们所说的分区。Windows系统,将文件分成两个部分,一个是用于引导操作系统启动的引导文件,一个是操作系统本身的文件。这两部分文件,在MBR磁盘模式时(Lagecy启动),可以分别放在两个不同的分区中,也可以放在同一分区中。对于GPT磁盘模式(UEFI启动),引导文件在ESP分区中,系统分区是我们常看到的C盘。
启动分区的容量通常在100MB到300MB,比较容易识别,而且是磁盘的第一个分区。
不过有时候,我们看不见引导分区,无法选择。这时候,我们需要给没显示出来的引导分区分配一个盘符,然后就可以看见了。下图展示了ESP分区的位置,且没有分配盘符,而C盘就是我们的系统分区(安装驱动器),MSR分区可以不必理会。

当选择好引导驱动器和安装驱动器后,最好将两者都格式化一下。
如果你的电脑是MBR磁盘模式,没有分配独立的引导分区,那么引导驱动器和安装驱动器,就都选择C盘。
在选项中的“版本”下拉列表框中,我们选择需要安装的系统版本,也就是家庭版、专业版、企业版等。这是因为微软的wim镜像文件,一个镜像文件,可以同时包含多个系统版本。
接下来,我们想跳过繁琐的设置,比如建立账户、语言选择、设置隐私等,直接采用administrator账户 登录系统。为了达到这个目的,我们需要一个自动应答文件,代替我们响应用户输入。下面是板板做好的内容,你只需要用记事本(notepad)建立一个xml类型的文本文件,然后把下面的内容粘贴进去,保存,本例中为unattend.xml。
<?xml version="1.0" encoding="utf-8"?>
<unattend xmlns="urn:schemas-microsoft-com:unattend">
    <settings pass="generalize">
        <component name="Microsoft-Windows-PnpSysprep" processorArchitecture="amd64" publicKeyToken="31bf3856ad364e35" language="neutral" versionScope="nonSxS" xmlns:wcm="http://schemas.microsoft.com/WMIConfig/2002/State" xmlns:xsi="http://www.w3.org/2001/XMLSchema-instance">
            <DoNotCleanUpNonPresentDevices>true</DoNotCleanUpNonPresentDevices>
            <PersistAllDeviceInstalls>true</PersistAllDeviceInstalls>
        </component>
    </settings>
    <settings pass="specialize">
        <component name="Microsoft-Windows-Deployment" processorArchitecture="amd64" publicKeyToken="31bf3856ad364e35" language="neutral" versionScope="nonSxS" xmlns:wcm="http://schemas.microsoft.com/WMIConfig/2002/State" xmlns:xsi="http://www.w3.org/2001/XMLSchema-instance">
            <RunSynchronous>
                <RunSynchronousCommand wcm:action="add">
                    <Order>1</Order>
                    <Path>net user administrator /active:yes</Path>
                    <WillReboot>Never</WillReboot>
                    <Description>Enable Admin Account</Description>
                </RunSynchronousCommand>
            </RunSynchronous>
        </component>
        <component name="Microsoft-Windows-Shell-Setup" processorArchitecture="amd64" publicKeyToken="31bf3856ad364e35" language="neutral" versionScope="nonSxS" xmlns:wcm="http://schemas.microsoft.com/WMIConfig/2002/State" xmlns:xsi="http://www.w3.org/2001/XMLSchema-instance">
            <CopyProfile>true</CopyProfile>
            <TimeZone>China Standard Time</TimeZone>
        </component>
        <component name="Microsoft-Windows-UnattendedJoin" processorArchitecture="amd64" publicKeyToken="31bf3856ad364e35" language="neutral" versionScope="nonSxS" xmlns:wcm="http://schemas.microsoft.com/WMIConfig/2002/State" xmlns:xsi="http://www.w3.org/2001/XMLSchema-instance">
            <Identification>
                <JoinWorkgroup>WORKGROUP</JoinWorkgroup>
            </Identification>
        </component>
        <component name="Microsoft-Windows-MicrosoftEdgeBrowser" processorArchitecture="amd64" publicKeyToken="31bf3856ad364e35" language="neutral" versionScope="nonSxS" xmlns:wcm="http://schemas.microsoft.com/WMIConfig/2002/State" xmlns:xsi="http://www.w3.org/2001/XMLSchema-instance">
            <FavoriteBarItems>
                <FavoriteBarItem wcm:action="add">
                    <ItemFavIconFile>http://dh.lanfutun.com/favicon.ico</ItemFavIconFile>
                    <ItemKey>lanfutun</ItemKey>
                    <ItemName>官网导航</ItemName>
                    <ItemUrl>http://dh.lanfutun.com</ItemUrl>
                </FavoriteBarItem>
            </FavoriteBarItems>
        </component>
    </settings>
    <settings pass="oobeSystem">
        <component name="Microsoft-Windows-Shell-Setup" processorArchitecture="amd64" publicKeyToken="31bf3856ad364e35" language="neutral" versionScope="nonSxS" xmlns:wcm="http://schemas.microsoft.com/WMIConfig/2002/State" xmlns:xsi="http://www.w3.org/2001/XMLSchema-instance">
            <OOBE>
                <ProtectYourPC>2</ProtectYourPC>
                <SkipMachineOOBE>true</SkipMachineOOBE>
                <SkipUserOOBE>true</SkipUserOOBE>
            </OOBE>
            <UserAccounts>
                <LocalAccounts>
                    <LocalAccount wcm:action="add">
                        <Description>Default Administrator Account</Description>
                        <DisplayName>Administrator</DisplayName>
                        <Group>Administrators</Group>
                        <Name>Administrator</Name>
                    </LocalAccount>
                </LocalAccounts>
            </UserAccounts>
        </component>
    </settings>
    <settings pass="windowsPE">
        <component name="Microsoft-Windows-Setup" processorArchitecture="amd64" publicKeyToken="31bf3856ad364e35" language="neutral" versionScope="nonSxS" xmlns:wcm="http://schemas.microsoft.com/WMIConfig/2002/State" xmlns:xsi="http://www.w3.org/2001/XMLSchema-instance">
            <EnableFirewall>false</EnableFirewall>
            <EnableNetwork>false</EnableNetwork>
            <Restart>Restart</Restart>
            <UserData>
                <AcceptEula>true</AcceptEula>
                <ProductKey>
                    <Key></Key>
                </ProductKey>
            </UserData>
        </component>
        <component name="Microsoft-Windows-International-Core-WinPE" processorArchitecture="amd64" publicKeyToken="31bf3856ad364e35" language="neutral" versionScope="nonSxS" xmlns:wcm="http://schemas.microsoft.com/WMIConfig/2002/State" xmlns:xsi="http://www.w3.org/2001/XMLSchema-instance">
            <SetupUILanguage>
                <UILanguage>zh-CN</UILanguage>
            </SetupUILanguage>
            <InputLocale>en-US;zh-CN</InputLocale>
            <LayeredDriver>1</LayeredDriver>
            <SystemLocale>zh-CN</SystemLocale>
            <UILanguage>zh-CN</UILanguage>
            <UserLocale>zh-CN</UserLocale>
            <UILanguageFallback>en-US</UILanguageFallback>
        </component>
    </settings>
    <cpi:offlineImage cpi:source="wim:e:/osdiy/install.wim#wps" xmlns:cpi="urn:schemas-microsoft-com:cpi" />
</unattend>
有了unattend.xml自动应答文件,在WinNTSetup中,勾选左下角的”无人值守“,并通过右侧下拉列表选择我们的自动应答文件。
最后,点击右下角“开始安装”,待完成后,重启电脑,然后呢,等着进桌面就可以了。

![RedHat服务器上[Errno 5] OSError: [Errno 2]的解决方法](https://img.pc-daily.com/uploads/allimg/4752/11135115c-0-lp.png)